
OCR can turn a scanned document, receipt, screenshot, photograph, or table into editable text.
But OCR is not magic.
If the source image is blurry, skewed, poorly lit, compressed, or difficult to read, even a capable OCR system can produce incorrect characters, missing words, or badly structured results.
The good news is that many OCR problems can be reduced before recognition even begins.
In most cases, improving the image is more useful than simply changing the OCR engine.
This guide explains the practical steps you can take to improve OCR accuracy for ordinary text, tables, receipts, documents, and image-to-CSV or image-to-Excel workflows.
What Affects OCR Accuracy?
OCR accuracy depends on several factors:
- image resolution
- text size
- sharpness
- lighting
- contrast
- background noise
- image rotation
- perspective distortion
- font and handwriting
- language
- document layout
- table structure
- image compression
- OCR configuration
For example, a clean scanned page with large black text on a white background is much easier to process than a photograph of a faded document taken at an angle.
Tesseract’s own documentation specifically highlights image quality, resolution, binarization, noise, rotation, borders, and page segmentation as factors that can affect recognition quality.
So before blaming the OCR engine, check the image.
1. Start With a High-Quality Image
The simplest way to improve OCR is to give the OCR system a better source image.
If possible, use:
- a sharp scan
- a clear photograph
- sufficient resolution
- good lighting
- readable text
- minimal compression
Avoid using a screenshot or downloaded image that has already been heavily compressed if a higher-quality original is available.
Google’s Cloud Vision documentation recommends sufficient image dimensions for OCR and notes that reducing the quality of lossy images such as JPEGs can reduce OCR accuracy.
Example
A document photographed with a modern phone under good lighting may produce much better OCR than the same document photographed from far away and then cropped heavily.
The difference is not necessarily the OCR software.
It is the quality of the information being supplied to it.
2. Increase Resolution When Text Is Too Small
OCR needs enough visual information to distinguish characters.
Consider:
Invoice Number: INV-2048If the text is large and sharp, the characters are relatively easy to distinguish.
If the same text occupies only a few pixels in height, characters such as:
- 1 and I
- 0 and O
- 5 and S
- 8 and B
can become harder to recognize.
Tesseract’s documentation notes that it generally works best with images around 300 DPI or higher for scanned material, although the optimal resolution depends on the document and text size.
For Google Cloud Vision OCR, the current documentation recommends approximately 1024 × 768 as a useful size for text detection and document text detection, while noting that larger images do not necessarily produce proportional accuracy improvements.
The important lesson is:
Do not make the image huge just for the sake of making it huge.
The text itself needs enough resolution.
3. Keep Text Sharp
Blurry text is one of the most obvious OCR problems.
For example:
Invoice Total: $1,250may become difficult to distinguish if the image has motion blur or focus problems.
Common causes include:
- moving the camera while taking the picture
- photographing from too far away
- low-quality scans
- excessive resizing
- repeated JPEG compression
If you are photographing a document, hold the camera steady and make sure the text is actually in focus before taking the picture.
A sharper original image is usually preferable to trying to recover heavily blurred text afterward.
4. Avoid Shadows and Glare
Lighting can dramatically affect document images.
A shadow across a page can make part of the text darker than the rest.
Glare can completely wash out characters.
For example:
Normal:
Product   Quantity   Price

Glare:
Product   Quanti[y]   [Price partly missing]
The OCR engine cannot reliably recognize information that is not clearly visible in the source image.
When photographing documents:
- use even lighting
- avoid strong reflections
- avoid casting your phone’s shadow over the page
- do not use a reflective surface directly behind the document
If possible, diffuse lighting is preferable to a harsh light source pointed directly at glossy paper.
Google’s Document AI documentation also exposes image-quality defects such as glare and text cutoff, illustrating why document-image quality matters to OCR workflows.
5. Straighten Skewed Documents
A document does not need to be dramatically tilted to cause problems.
Even a slightly rotated page can make text-line segmentation harder.
For example:
Straight:
-------------------------
Product  Quantity  Price
Laptop      2        800
-------------------------
versus a photographed page where every line is slightly diagonal.
Deskewing rotates the image so that text lines become horizontal again.
Tesseract specifically notes that skew can significantly reduce the quality of line segmentation and recommends rotating the page so text lines are horizontal.
This is especially important for:
- scanned documents
- receipts
- tables
- forms
- photographed pages
6. Correct Perspective Distortion
Skew and perspective are not exactly the same problem.
Skew means the page is rotated.
Perspective distortion happens when you photograph the page from an angle.
For example, a rectangular document may appear more like:
    __________________
   /                 /
  /_________________/
instead of a normal rectangle.
The text lines can then appear to change size or angle across the page.
If possible, photograph documents from directly above rather than from a steep angle.
For difficult images, image-processing software can attempt to correct the perspective before OCR.
This can be particularly useful for:
- receipts
- forms
- books
- posters
- documents photographed with a phone
7. Remove Unnecessary Background
OCR should ideally process the document rather than everything surrounding it.
Suppose a photograph contains:
- a table
- a wooden desk
- a person’s hand
- a pen
- shadows around the page
There is no reason for the OCR engine to analyze all of that if only the document matters.
Crop the image so that the relevant content occupies most of the frame.
However, avoid cropping too tightly around the letters.
Tesseract’s documentation notes that excessively large borders can cause problems, while completely removing useful borders can also affect recognition; a small, reasonable margin around the text can be helpful.
The goal is:
Remove irrelevant background while keeping a small amount of useful margin around the document or text.
8. Improve Contrast
OCR generally benefits when characters are clearly separated from their background.
A simple example is:
Dark text + light background
This is usually easier to process than:
Light gray text + gray background
Contrast adjustment can make faded text more distinguishable.
For old scans, however, increasing contrast too aggressively can also remove useful details.
So the goal is not maximum contrast.
The goal is clear separation between text and background.
9. Use Binarization Carefully
Binarization converts an image into something closer to black and white.
For example:
Original → Grayscale → Threshold → OCRThis can be useful for clean scanned documents.
But it is not universally beneficial.
Tesseract already performs image processing internally, including binarization. Its documentation notes that the result can still be suboptimal for pages with uneven backgrounds, where alternative thresholding methods may help.
For difficult documents, adaptive thresholding can sometimes work better than applying a simple global threshold.
This is particularly relevant when the page contains:
- shadows
- uneven lighting
- faded areas
- textured paper
10. Remove Image Noise
Noise refers to unwanted visual variation that does not belong to the actual document.
Examples include:
- scanning dots
- camera sensor noise
- compression artifacts
- speckles
- stains
- paper texture
Noise can make characters harder to distinguish.
For example, a clean letter:
Amay appear surrounded by random dots:
. A .. .
.. . A .
A preprocessing step can sometimes reduce that noise before OCR.
Tesseract’s documentation specifically identifies noise as a potential cause of reduced recognition accuracy.
But aggressive noise removal can also damage small characters.
So use it carefully.
11. Do Not Overprocess the Image
This is an important point that is often missed.
More preprocessing does not automatically mean better OCR.
You can make things worse by applying too many filters.
For example:
Original
↓
Heavy sharpening
↓
Strong threshold
↓
Aggressive noise removal
↓
Repeated resizing
↓
OCR
The result may contain distorted characters that were actually clearer in the original.
A better approach is:
Make the minimum changes needed to improve readability.
Start with:
- crop
- straighten
- improve lighting/contrast
- resize if necessary
- remove obvious noise
Then test the OCR result.
12. Use the Correct OCR Language
Language selection can matter significantly.
A document written in Japanese, Arabic, Hindi, or another script should not automatically be treated as English.
Language models help OCR systems interpret the character patterns correctly.
Google Cloud Vision supports multiple languages and can use optional language hints when appropriate. Its documentation also notes that automatic language detection is often preferable, and that an incorrect language hint can actually hinder results.
That leads to an important rule:
Only provide a language hint when you have a good reason to do so.
If the document contains multiple languages, use an OCR system and configuration that supports the relevant languages.
For a detailed explanation, see OCR Language Support.
13. Do Not Assume More Language Hints Mean Better OCR
Suppose an image contains English text.
You might think adding:
English + French + German + Spanish + Japanesewill make the OCR engine more capable.
Not necessarily.
For Google Cloud Vision, the documentation states that an empty language-hint value usually produces the best result because the service can automatically detect the language. It also warns that an incorrect hint can be a significant hindrance.
So language configuration should match the actual document.
Do not simply add every available language.
14. Choose the Correct OCR Segmentation Mode
Some OCR engines offer different ways of interpreting the layout of an image.
Tesseract, for example, provides page segmentation modes for different situations, including:
- full pages
- single columns
- single blocks
- single lines
- single words
- sparse text
Tesseract’s documentation explains that its default page segmentation assumes a page of text, while other modes can be more appropriate for smaller or differently structured regions.
This matters because:
A full document and a single text line are different OCR problems.
If you are processing a small cropped region, using a segmentation mode designed for a full page may not be ideal.
15. Tables Need More Than OCR
This is particularly important for image-to-CSV and image-to-Excel conversion.
Suppose OCR correctly recognizes:
Laptop 2 800
Mouse 5 15
Keyboard 3 40
That does not automatically tell the system:
Product | Quantity | Price
Laptop  | 2        | 800
Mouse   | 5        | 15
Keyboard| 3        | 40
The system also needs to analyze layout and table structure.
Tesseract’s documentation explicitly notes that tables can be difficult to recognize without custom segmentation or layout analysis.
For a detailed explanation of this problem, see How OCR Detects Tables.
16. Improve the Image Before Trying a Different OCR Engine
When OCR output is poor, people often immediately switch tools.
Sometimes that helps.
But first ask:
Is the source image good enough?
For example:
Poor image
↓
OCR A → Poor result
OCR B → Poor result
OCR C → Poor result
If all three systems receive the same unreadable image, changing the OCR engine may not solve the underlying problem.
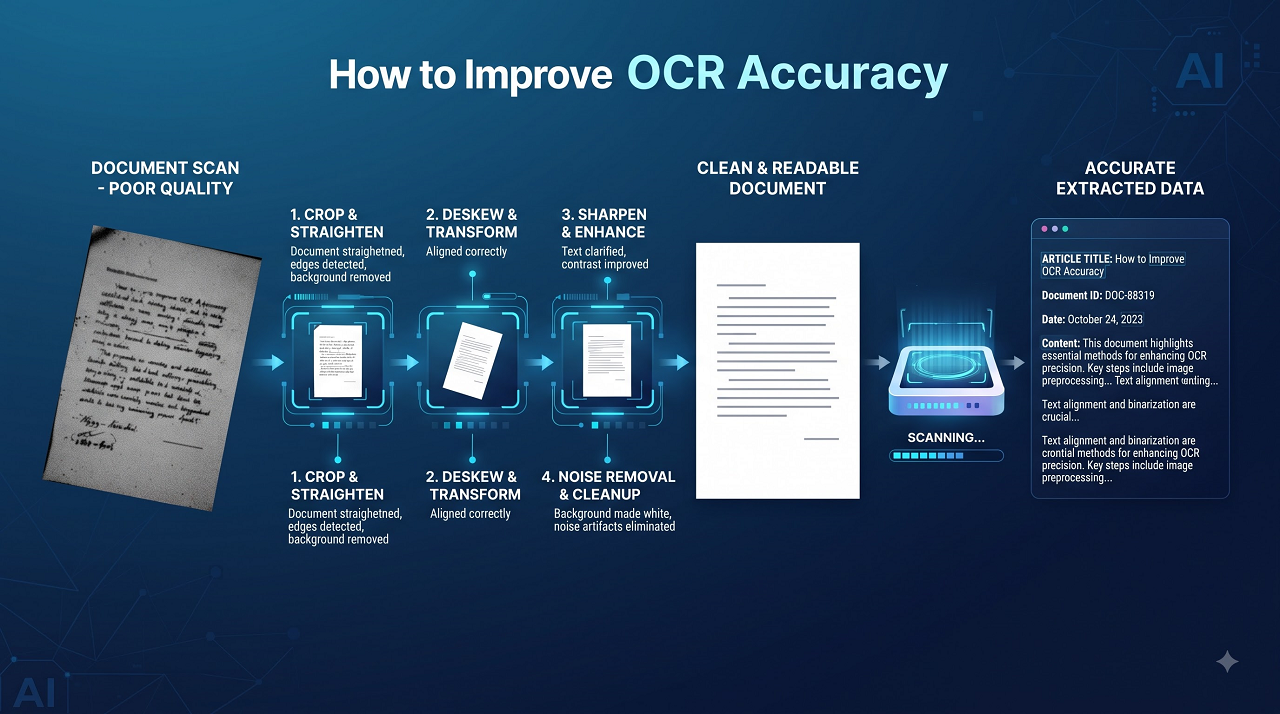
Try:
Poor image
↓
Crop
↓
Deskew
↓
Improve contrast
↓
Reduce noise
↓
OCR
You may get a much better result without changing the recognition engine.
Tesseract’s documentation similarly emphasizes improving the input image when recognition quality is poor.
17. Use Different Preprocessing for Different Documents
There is no single preprocessing recipe that works perfectly for every image.
A clean printed document may need very little processing.
A faded historical scan may require contrast and threshold adjustments.
A photographed receipt may benefit from perspective correction.
A table may require layout-aware processing.
A handwritten note may need a different OCR model or language configuration.
Think of preprocessing as:
document-specific preparation
rather than a fixed sequence that should always be applied.
18. Improve OCR for Receipts
Receipts are particularly challenging because they often contain:
- small text
- narrow columns
- faded thermal printing
- irregular spacing
- multiple prices
- product codes
- totals
- tax information
For better receipt OCR:
- photograph the receipt straight
- use even lighting
- avoid glare
- keep the entire receipt in focus
- crop away the surrounding background
- preserve enough resolution for small text
- check the extracted totals manually
If your final goal is Excel, you also need to preserve the relationship between product names, quantities, and prices.
See Scan Receipts to Excel Automatically.
19. Improve OCR for Invoices
Invoices often contain several different content types on the same page.
For example:
Invoice Number
Customer
Date

Product | Qty | Price | Total
--------------------------------
Laptop  |  2  | 800   | 1600
Mouse   |  5  | 15    | 75

Subtotal
Tax
Total
Improving the OCR result requires more than recognizing individual words.
You need to preserve the relationships between fields and table cells.
For complex invoices, layout-aware document processing can therefore be more useful than plain text OCR.
If your workflow involves invoices, see Convert Invoice Images to Excel for Accounting.
20. Improve OCR for Handwriting
Handwritten text is inherently more variable than printed text.
Characters can:
- change shape
- connect together
- overlap
- vary in size
- use unusual spacing
Image quality becomes especially important.
Try to:
- use a sharp image
- avoid shadows
- capture the complete writing
- use sufficient resolution
- select the appropriate language
- avoid aggressive preprocessing
Google Cloud Vision provides handwriting OCR capabilities and supports language hints for handwriting-related requests.
However, handwriting recognition quality can vary substantially depending on the writing style and source image.
21. Be Careful With JPEG Compression
JPEG compression reduces file size by removing image information.
For ordinary photographs, this may be acceptable.
For small text, however, aggressive compression can introduce artifacts around characters.
For example:
Original:
Invoice #10482

Heavily compressed:
Invoice #10?82
If you have the choice, use the highest-quality source image that is practical.
Do not repeatedly save and recompress the same document image.
Google’s Cloud Vision documentation specifically warns that reducing the quality of lossy formats such as JPEG can degrade image quality and OCR accuracy.
22. Avoid Cropping Text Too Tightly
Cropping is useful, but extreme cropping can create another problem.
For example:
[Invoice Number]is safer than cutting directly through the first and last characters.
Keep a small amount of surrounding space.
Tesseract’s documentation notes that completely removing borders or using excessively large borders can both create recognition problems.
A practical rule is:
Crop unnecessary content, but leave a small margin around the relevant text.
23. Separate Complex Regions When Necessary
Suppose one image contains:
- a paragraph
- a table
- a receipt total
- a handwritten note
Trying to process everything using one OCR layout assumption may not produce the best result.
In some workflows, it can be useful to identify separate regions:
Document
├── Header
├── Paragraph
├── Table
└── Notes
Each region can then be processed according to its own structure.
This is particularly useful for automated document-processing systems.
24. Check the OCR Output Instead of Trusting It Blindly
Even a very good OCR system can make mistakes.
This matters especially when extracted information will be used for:
- accounting
- invoices
- financial records
- medical documents
- legal documents
- inventory
- business reports
A useful workflow is:
Image → OCR → Review → Correct → Export
rather than:
Image → OCR → Automatically trust everything
For high-value data, always verify important numbers and fields against the original image.
Common OCR Problems and Their Fixes
| OCR Problem | Likely Cause | Practical Fix |
|---|---|---|
| Missing characters | Low resolution or blur | Use a sharper, higher-resolution image |
| Wrong letters | Poor contrast or noise | Improve contrast and clean the image |
| Text appears scrambled | Incorrect layout detection | Try appropriate segmentation/layout processing |
| Rows merge together | Skew or complex layout | Deskew and use layout-aware extraction |
| Columns shift | Table structure not detected | Use table/layout extraction |
| Handwriting is inaccurate | Writing variability | Use handwriting-capable OCR and better images |
| Text is cut off | Poor cropping | Include the complete text and a small margin |
| OCR misses faded text | Low contrast | Improve contrast or lighting |
| Background becomes text | Excessive noise | Crop and reduce background noise |
| Multilingual text is wrong | Incorrect language handling | Use appropriate language support |
A Practical OCR Improvement Workflow
If you want a simple process to follow, use this checklist:
Step 1: Check the original image
Make sure the text is actually readable.
Step 2: Crop unnecessary background
Keep the document or relevant text area.
Step 3: Straighten the image
Correct obvious rotation or perspective problems.
Step 4: Check resolution
Make sure small characters have enough pixels to be recognized.
Step 5: Improve contrast if necessary
Make text clearly distinguishable from the background.
Step 6: Reduce obvious noise
Remove speckles, artifacts, and distracting background patterns.
Step 7: Select the appropriate language
Use language hints only when they are appropriate.
Step 8: Consider document layout
Tables, forms, receipts, and multi-column documents may require layout-aware extraction.
Step 9: Run OCR
Process the cleaned image.
Step 10: Review the result
Compare important information against the original image.
This workflow solves many common OCR problems without requiring complicated changes to the OCR engine.
What Usually Helps the Most?
If you only have time to improve a few things, focus on these:
1. Better source image
Sharp and readable images give OCR better information to work with.
2. Correct alignment
Straighten skewed documents.
3. Sufficient resolution
Make sure small characters are visible.
4. Good contrast
Separate text from the background.
5. Correct language
Use appropriate language support when needed.
6. Layout-aware extraction
Use table or document-structure processing when the output needs rows, columns, or fields.
These improvements address the most common causes of poor OCR results.
What Does Not Automatically Improve OCR?
Several common assumptions can be misleading.
“Just increase the image size.”
Upscaling a blurry image does not recreate missing detail.
“Use every language available.”
Incorrect language hints can sometimes make recognition worse. Google explicitly warns about this.
“Apply as many filters as possible.”
Overprocessing can damage characters.
“Switch OCR engines immediately.”
A poor source image can produce poor results across multiple engines.
“Perfect text recognition means perfect table extraction.”
It does not.
A system can recognize every word correctly while still putting values into the wrong columns.
Does AI OCR Solve Accuracy Problems?
AI-assisted OCR can improve some difficult recognition and document-understanding tasks, but it does not eliminate the importance of image quality.
An AI model cannot reliably recover information that is completely missing from the source image.
For example, if glare hides half of a number:
₹1,2[glare]0the system may have to infer what is missing.
That is fundamentally different from recognizing clearly visible text.
The best workflow is therefore not:
AI instead of image preparation
but:
Good image + suitable OCR + appropriate layout processing
For a broader explanation of the difference between OCR and AI OCR, see OCR vs AI OCR.
How This Matters for Image to CSV and Excel
If your final goal is a spreadsheet, OCR accuracy is only one part of the problem.
You need:
Readable text
plus
Correct structure
For example:
Image
↓
Preprocessing
↓
OCR
↓
Table/Layout Detection
↓
Rows + Columns
↓
Data Cleanup
↓
CSV / Excel
A system that produces perfectly recognized text but loses the table structure may still require significant manual work.
That is why improving OCR accuracy should be combined with proper table extraction when working with structured documents.
See How OCR Detects Tables for more information.
Final Takeaway
Improving OCR accuracy does not always require a different OCR engine.
Start with the image.
Use a clear, sufficiently high-resolution source. Keep text sharp, reduce shadows and glare, straighten the document, correct perspective when necessary, and remove distracting background noise.
Then consider the OCR configuration.
Use appropriate language support and layout or segmentation settings for the type of document you are processing.
For tables, invoices, receipts, and forms, remember that recognizing text and understanding document structure are separate tasks.
A practical OCR workflow is:
Better image → Better preprocessing → Appropriate OCR → Layout analysis → Review → Structured output
If you are converting images into CSV or Excel, this complete workflow matters much more than OCR alone.
Related Guides
- OCR vs AI OCR
- How OCR Detects Tables
- Why OCR Fails on Tables and How to Fix It
- OCR Language Support
- How to Convert Image to Excel
- Convert Image to CSV Online Free
- Scan Receipts to Excel Automatically
Improve Your OCR Results
Have a difficult image, scanned table, receipt, or document?
Try cleaning the image first, then extract the structured data.
🔍 Ready to Extract Your Image Data?
Upload your image and turn readable tables and documents into CSV or Excel data.
Convert Image to Data →